
Windows Installations USB-Stick erstellen
Ich hatte vor einiger Zeit für meinen kleinen Bruder einen PC zusammengestellt (siehe Aufrüstung des (Teenie-)Computers); nun hat er sich den ausversehen verkonfiguriert (eigentlich ganz lustige Sache… er hat sich über sein bestehendes Windows 10 Professional direkt Windows Server 2019 Standard Core installiert … hups 🤷🏼♂️😏). Um ihm zu helfen und wieder das normale Windows zu erhalten, musste ich mir erstmal einen Installations-Stick erstellen, denn ich hatte leider keinen mehr parat. Also USB-Stick organisiert und ISO (hatte ich noch auf meinem Labor 4 (ab 2022)).
Ablauf:
- Vorbereiten des USB-Sticks
- Kopieren der Dateien vom ISO-Image zum USB-Stick
1. Vorbereiten des USB-Sticks
Der USB-Stick wurde an einen freien USB-Port angesteckt, dann wurde eine administrative PowerShell gestartet und folgende Befehle nacheinander eingetragen:
diskpart
list disk
select disk ZAHL
clean
create partition primary
active
FORMAT FS=NTFS LABEL="Win10-21H1" QUICK
assign
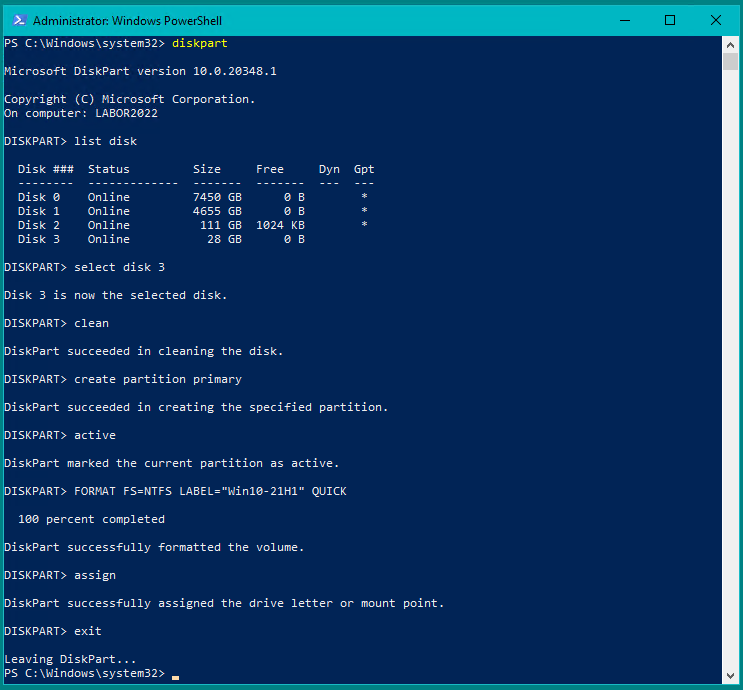
exitDie gesamte Console sah so aus, dabei ist zu beachten, dass in diesem Fall der USB-Stick als “Disk 3” erkannt wurde, das kann bei jedem unterschiedlich sein!
PS C:\Windows\system32> diskpart

Microsoft DiskPart version 10.0.20348.1

Copyright (C) Microsoft Corporation.
On computer: LABOR2022

DISKPART> list disk

  Disk ###  Status         Size     Free     Dyn  Gpt
  --------  -------------  -------  -------  ---  ---
  Disk 0    Online         7450 GB      0 B        *
  Disk 1    Online         4655 GB      0 B        *
  Disk 2    Online          111 GB  1024 KB        *
  Disk 3    Online           28 GB      0 B

DISKPART> select disk 3

Disk 3 is now the selected disk.

DISKPART> clean

DiskPart succeeded in cleaning the disk.

DISKPART> create partition primary

DiskPart succeeded in creating the specified partition.

DISKPART> active

DiskPart marked the current partition as active.

DISKPART> FORMAT FS=NTFS LABEL="Win10-21H1" QUICK

  100 percent completed

DiskPart successfully formatted the volume.

DISKPART> assign

DiskPart successfully assigned the drive letter or mount point.

DISKPART> exit

Leaving DiskPart...
PS C:\Windows\system32>
2. Kopieren der Dateien vom ISO-Image zum USB-Stick
Anschließend das ISO-Image “einlegen”, also “mounten”. Unter Windows einfach einen Rechtsklick auf das Image machen und im Kontextmenü auf “Mount” klicken. Dann prüfen & merken, welchen Laufwerksbuchstaben sowohl das eingelegte ISO-Image als auch der USB-Stick hat.
Jetzt eine administrative PowerShell öffnen (oder die aus Schritt 1 verwenden, sofern noch geöffnet) und folgenden Befehl eingeben:
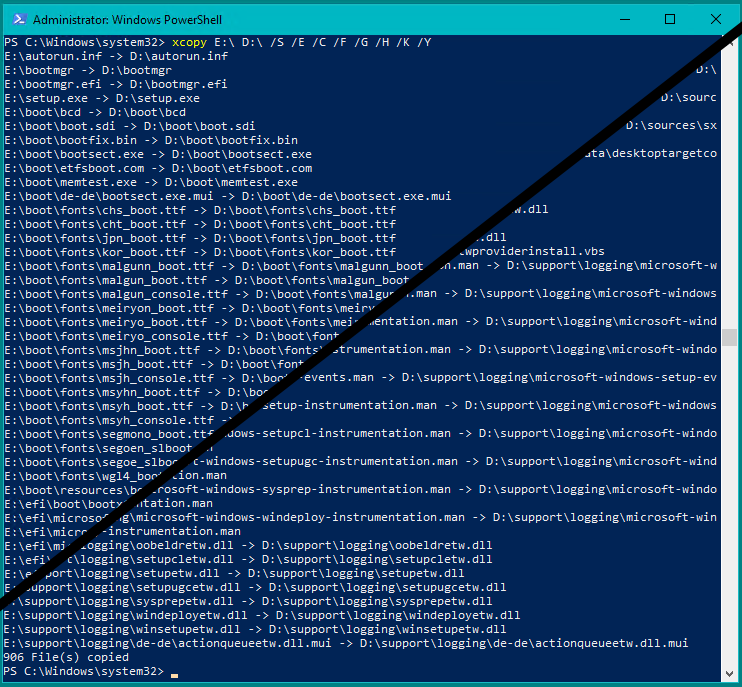
xcopy E:\ D:\ /S /E /C /F /G /H /K /YBei mir hat das ISO-Image den Laufwerksbuchstaben “E:” und der USB-Stick “D:”. Die o.g. Parameter geben an:
/S           Copies directories and subdirectories except empty ones.
/E           Copies directories and subdirectories, including empty ones.
 Same as /S /E. May be used to modify /T.
/C           Continues copying even if errors occur.
/F           Displays full source and destination file names while copying.
/G           Allows the copying of encrypted files to destination that does
 not support encryption.
/H           Copies hidden and system files also.
/K           Copies attributes. Normal Xcopy will reset read-only attributes.
/Y           Suppresses prompting to confirm you want to overwrite an
 existing destination file.
Hier der gekürzte Ablauf:
PS C:\Windows\system32> xcopy E:\ D:\ /S /E /C /F /G /H /K /Y
E:\autorun.inf -> D:\autorun.inf
E:\bootmgr -> D:\bootmgr
E:\bootmgr.efi -> D:\bootmgr.efi
E:\setup.exe -> D:\setup.exe
E:\boot\bcd -> D:\boot\bcd
E:\boot\boot.sdi -> D:\boot\boot.sdi
E:\boot\bootfix.bin -> D:\boot\bootfix.bin
E:\boot\bootsect.exe -> D:\boot\bootsect.exe
E:\boot\etfsboot.com -> D:\boot\etfsboot.com
E:\boot\memtest.exe -> D:\boot\memtest.exe
E:\boot\de-de\bootsect.exe.mui -> D:\boot\de-de\bootsect.exe.mui
E:\boot\fonts\chs_boot.ttf -> D:\boot\fonts\chs_boot.ttf
E:\boot\fonts\cht_boot.ttf -> D:\boot\fonts\cht_boot.ttf
E:\boot\fonts\jpn_boot.ttf -> D:\boot\fonts\jpn_boot.ttf

...

E:\support\logging\microsoft-windows-setup-instrumentation.man -> D:\support\logging\microsoft-windows-setup-instrumentation.man
E:\support\logging\microsoft-windows-setupcl-instrumentation.man -> D:\support\logging\microsoft-windows-setupcl-instrumentation.man
E:\support\logging\microsoft-windows-setupugc-instrumentation.man -> D:\support\logging\microsoft-windows-setupugc-instrumentation.man
E:\support\logging\microsoft-windows-sysprep-instrumentation.man -> D:\support\logging\microsoft-windows-sysprep-instrumentation.man
E:\support\logging\microsoft-windows-windeploy-instrumentation.man -> D:\support\logging\microsoft-windows-windeploy-instrumentation.man
E:\support\logging\oobeldretw.dll -> D:\support\logging\oobeldretw.dll
E:\support\logging\setupcletw.dll -> D:\support\logging\setupcletw.dll
E:\support\logging\setupetw.dll -> D:\support\logging\setupetw.dll
E:\support\logging\setupugcetw.dll -> D:\support\logging\setupugcetw.dll
E:\support\logging\sysprepetw.dll -> D:\support\logging\sysprepetw.dll
E:\support\logging\windeployetw.dll -> D:\support\logging\windeployetw.dll
E:\support\logging\winsetupetw.dll -> D:\support\logging\winsetupetw.dll
E:\support\logging\de-de\actionqueueetw.dll.mui -> D:\support\logging\de-de\actionqueueetw.dll.mui
906 File(s) copied
PS C:\Windows\system32>
Der USB-Stick war damit fertig und konnte für die Installation verwendet werden.
Die obige Anleitung hier noch als Galerie:


Endlich mal eine gute Anleitung wie man einen solchen USB-Stick erstellen kann!
Das wird direkt mal ausprobiert, vielen Dank!